We use cookies to ensure that we give you the best experience on our website.
Contact Founder
Still have doubts?
Connect directly with our Founder. Whether it’s about pricing or technical details, get a straight answer and an exclusive “Founder’s Bonus” for your first order.
900+ Satisfied Clients
🏆 Over 1000+ Custom Projects Successfully Delivered.
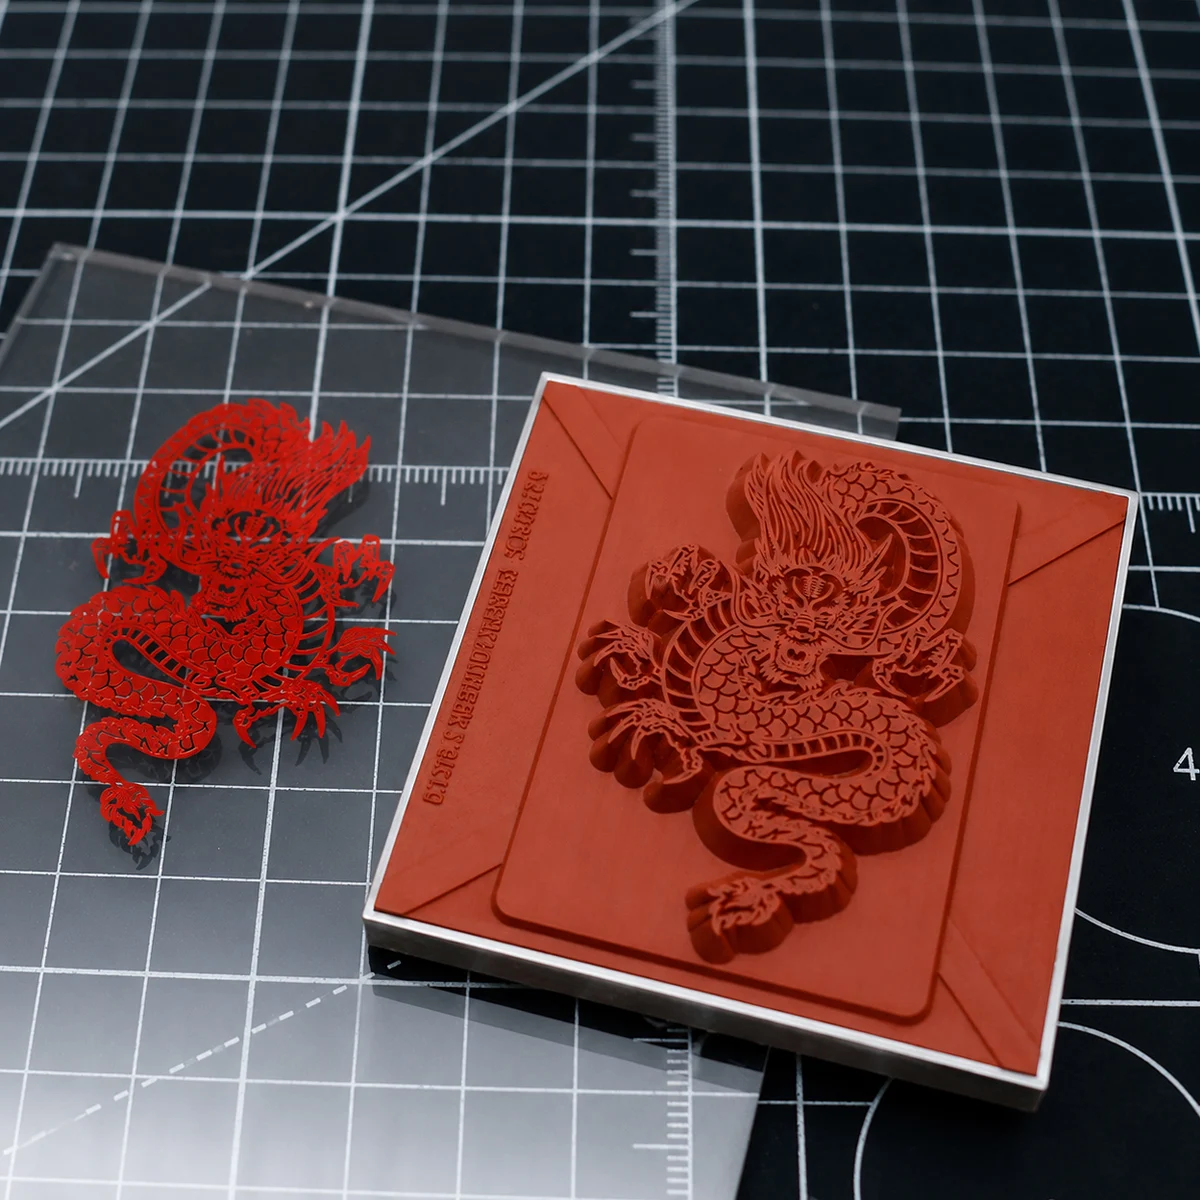
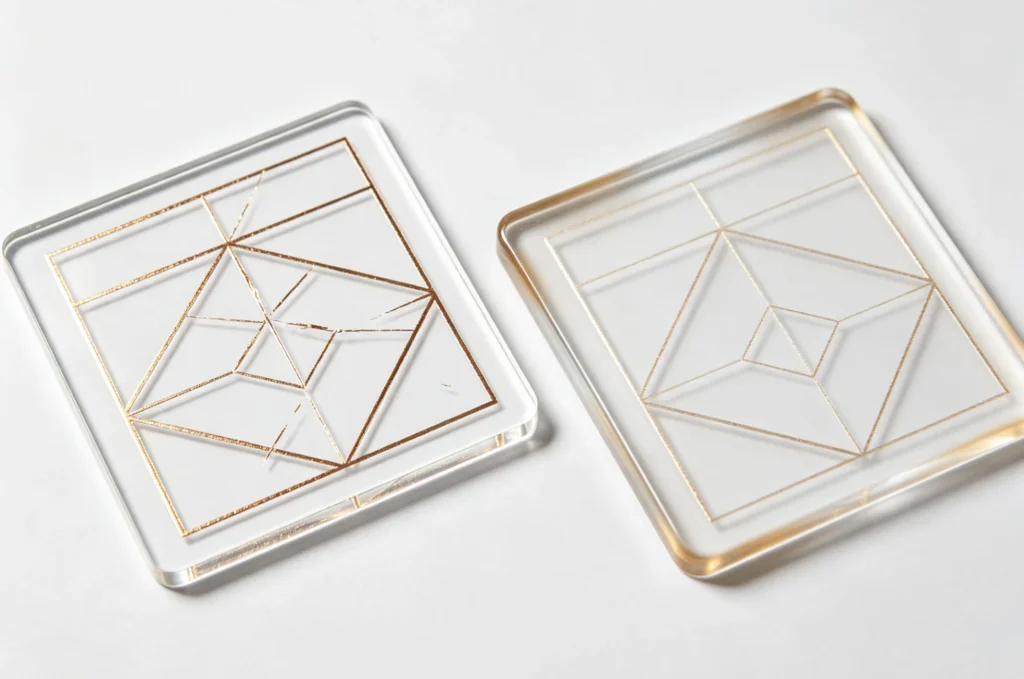
Fine‑line graphic validation sample; our tooling handles complex artwork for acrylic awards, signage and gift applications.
Best Acrylic Foil Stamping Temperature: TJ8020PS Test at 170–200°C
We tested hot foil stamping on PMMA acrylic sheet with a TJ8020PS machine and silicone mold at 170°C, 180°C, 190°C, and 200°C. The 190°C setting produced the best balance of complete foil transfer, sharp edges, clear details, even metallic gloss, and lower risk of acrylic softening or deformation.
What is the best acrylic foil stamping temperature? In the documented ZHENGFEI test, the best reference result came from 190°C for 1 second using a TJ8020PS hot stamping machine, a silicone mold、および PMMA acrylic sheet.
The test compared 170°C, 180°C, 190°C, and 200°C. At 170°C, the foil transfer was not complete enough for fine details. At 180°C, the transfer improved but some areas could still be uneven. At 190°C, the foil transferred evenly with sharp edges, clear details, and natural metallic gloss. At 200°C, transfer became fuller, but the acrylic received more heat and the risk of edge spread, pressure marks, gloss loss, or slight deformation increased.
This article is for sign makers, display manufacturers, award and gift suppliers, electronic panel producers, packaging companies, and OEM buyers who need to stamp logos, lettering, or decorative graphics on acrylic plate. The 190°C setting is a reference from this test, not a universal rule for every acrylic grade, thickness, coating, foil, or product shape.
Quick Answer: What Temperature Should You Use for Acrylic Foil Stamping?
For the tested combination of TJ8020PS, silicone mold, and PMMA acrylic sheet, start with:
Use 190°C as the first sample setting when your material and tooling are similar. If the foil is incomplete, check pressure, surface cleanliness, foil compatibility, and silicone-mold contact before making a large temperature change. If the acrylic loses gloss or shows marks, reduce heat or dwell time and repeat a controlled sample test.
For a different substrate, do not copy this temperature directly. Our pearl paper foil stamping temperature test used 110°C on pearl paper envelopes, which shows why material-specific testing matters.
High‑precision CNC engraved foil stamping samples, factory‑direct custom dies deliver sharp clean metallic foil transfer on acrylic.
Why Acrylic Sheet Needs a Different Foil Stamping Setting
Acrylic sheet, commonly called PMMA, is valued for transparency, gloss, and easy fabrication. It is used for advertising signs, display plates, awards, craft products, electronic panels, decorative parts, and premium product packaging. A general material reference is available from this overview of poly(methyl methacrylate).
Those same visual properties make acrylic both attractive and demanding. A foil logo can add a strong metallic contrast to a clear, colored, or frosted acrylic part. However, a small change in gloss, a shallow pressure mark, or a slightly distorted edge can be visible immediately on a smooth acrylic surface.
The process therefore has two competing requirements:
The foil must receive enough heat to release and attach to the acrylic.
The acrylic must not receive excessive heat or pressure that changes its surface.
Hot stamping transfers a decorative layer by combining heat, pressure, foil, and a die or mold. This general hot stamping process explains why temperature cannot be judged separately from pressure and contact. On acrylic, the relevant variables include:
温度
停留時間
Pressure level and pressure uniformity
Silicone-mold hardness and condition
Acrylic thickness and grade
Acrylic surface treatment
Foil model and release temperature
Artwork size, line weight, and solid area
If you are comparing foil materials before testing, read hot stamping foil vs toner foil vs Cricut foil. Foil color alone does not tell you whether the foil will release and adhere correctly to a particular plastic surface.
Why a Silicone Mold Works Well on Acrylic
The source test used a silicone mold rather than a rigid metal die. Silicone is flexible and elastic; a general material reference is available here: silicone.
During pressure, a silicone mold can conform to the acrylic surface and help the foil stay in more even contact with the product. This is useful when the product has a slight height difference, a curved area, a textured surface, or an irregular shape. More even contact can reduce local transfer gaps and make the metallic finish look more consistent.
The mold does not remove the need for good fixturing. Acrylic still needs to be supported from underneath, the stamping area needs to be stable, and the silicone surface must be clean. Dust, foil residue, damaged edges, or uneven mold wear can create local defects even when the temperature is correct.
Documented recommended condition: 190°C / 1 second
Comparison temperatures: 170°C, 180°C, 190°C, and 200°C
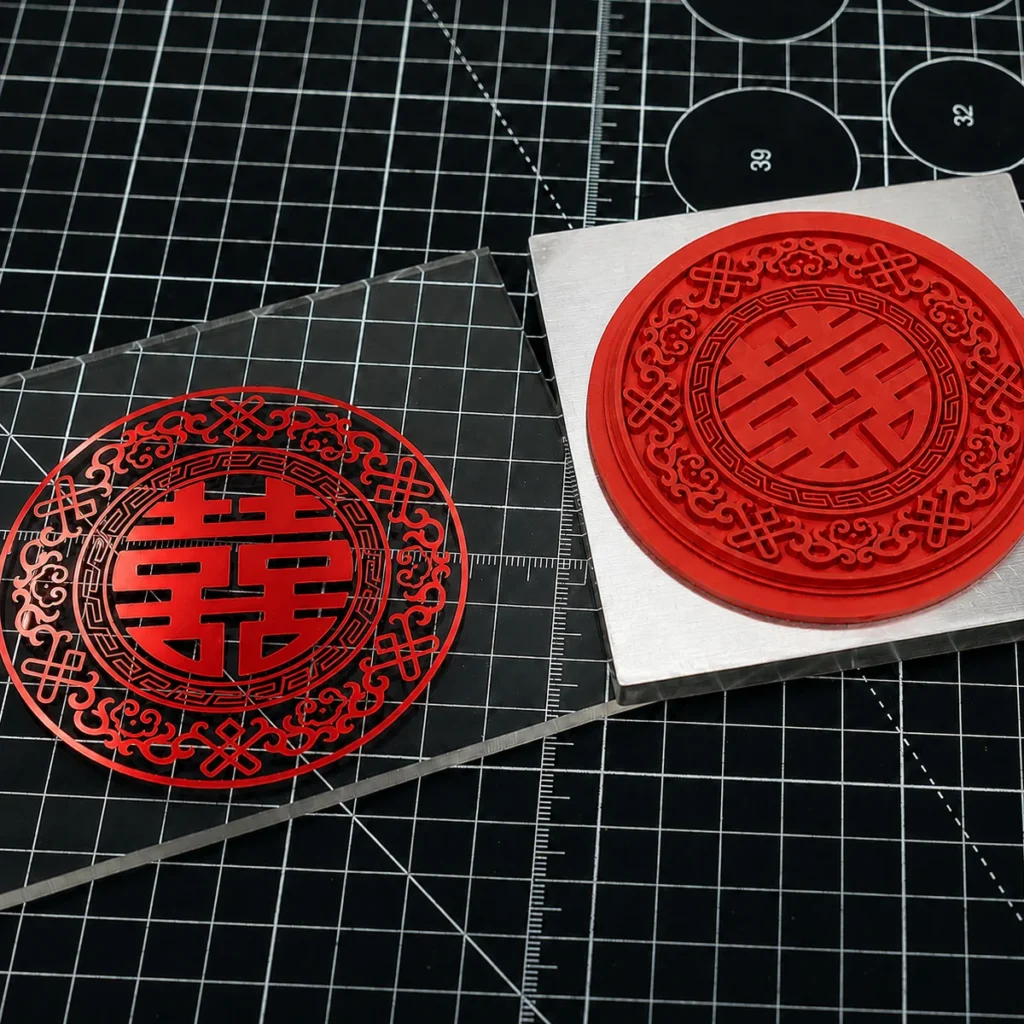
The acrylic samples included detailed circular artwork and a dragon-style graphic. These designs are useful for judging both solid areas and fine lines. A large circular pattern shows whether foil transfer is even across a wider area, while the dragon graphic reveals whether thin details remain clean.
The report evaluates the process through practical production criteria:
Whether the foil layer transfers completely.
Whether fine text and thin lines remain visible.
Whether the edges stay sharp.
Whether the metallic gloss is even and natural.
Whether the acrylic surface stays stable after heating.
Temperature Comparison: 170°C, 180°C, 190°C, and 200°C
The following summary follows the original acrylic test report.
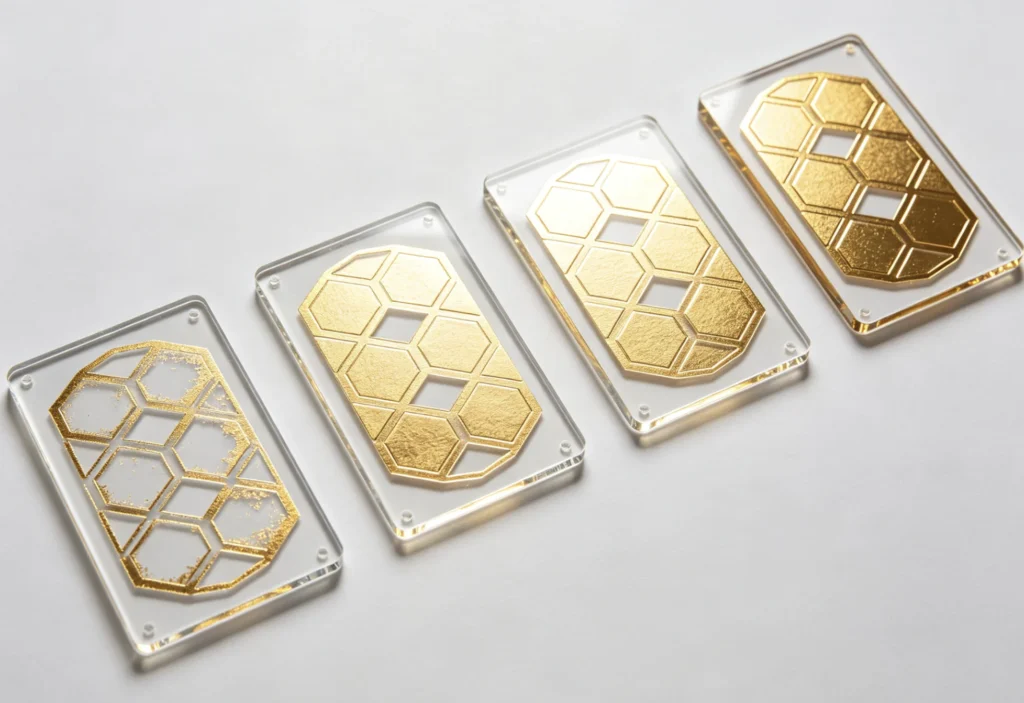
Batch test samples verify foil evenness; we offer free design service for custom acrylic hot stamping artwork.
温度
Observed transfer behavior
Surface and production judgment
170°C
Foil release was not sufficient. Fine text and thin lines were more likely to show missing foil or weak adhesion.
Too low for a stable reference result
180°C
Most of the artwork transferred and metallic gloss improved, but some fine or large areas could remain slightly incomplete.
Improved, but not the best result
190°C
Foil transferred evenly and completely; edges were sharp, details were clear, and gloss looked full and natural.
Recommended reference in this test
200°C
Transfer was fuller, especially on larger areas, but heat exposure increased the risk of spread, marks, gloss change, or deformation.
Use cautiously; not recommended as a long-run default
170°C: Foil Transfer Was Still Incomplete
At 170°C, the foil did not release fully enough from the carrier film. Fine letters, thin lines, and detailed graphic areas were the first places to show missing foil or weak attachment. The overall metallic gloss was also weaker.
This result is common when the temperature is below the working range of the foil and substrate combination. Lower heat can protect the acrylic from thermal stress, but it does not help if the foil layer cannot activate and bond. Raising temperature is one possible adjustment, but pressure, foil choice, and mold contact should be checked at the same time.
If you are troubleshooting incomplete transfer across different substrates, see why foil does not transfer. The exact temperature will change by material, but the diagnostic sequence is still useful.
180°C: Better Transfer with Some Remaining Unevenness
At 180°C, the foil transfer became more stable. Most of the artwork could be seen, metallic gloss improved, and the edges looked clearer than at 170°C.
However, the report notes that fine artwork or larger stamping areas could still show slight transfer insufficiency. For a simple medium-size logo, 180°C may be a workable sampling point. For a detailed logo, decorative pattern, or large solid area, it did not provide the same consistency as 190°C.
190°C: The Recommended Reference Condition
The report identifies 190°C as the recommended reference temperature. At 190°C for 1 second, the foil layer transferred evenly and completely to the acrylic sheet. The design edges were sharp, the details were clear, and the metallic gloss appeared natural and full.
The silicone mold helped the process by conforming to the acrylic surface and distributing pressure more evenly. That reduced the chance of local weak contact and supported a more consistent appearance across the graphic.
The short 1-second dwell time is also important. It supplies the required heat while limiting how long the acrylic remains exposed to the heated tooling. According to the report, this balance reduced the risk of surface gloss loss, softening, and slight deformation compared with a longer high-temperature cycle.
For this tested combination, 190°C / 1 second is the best starting point for sampling. It should still be verified on the actual acrylic sheet, foil, mold, and product fixture before batch production.
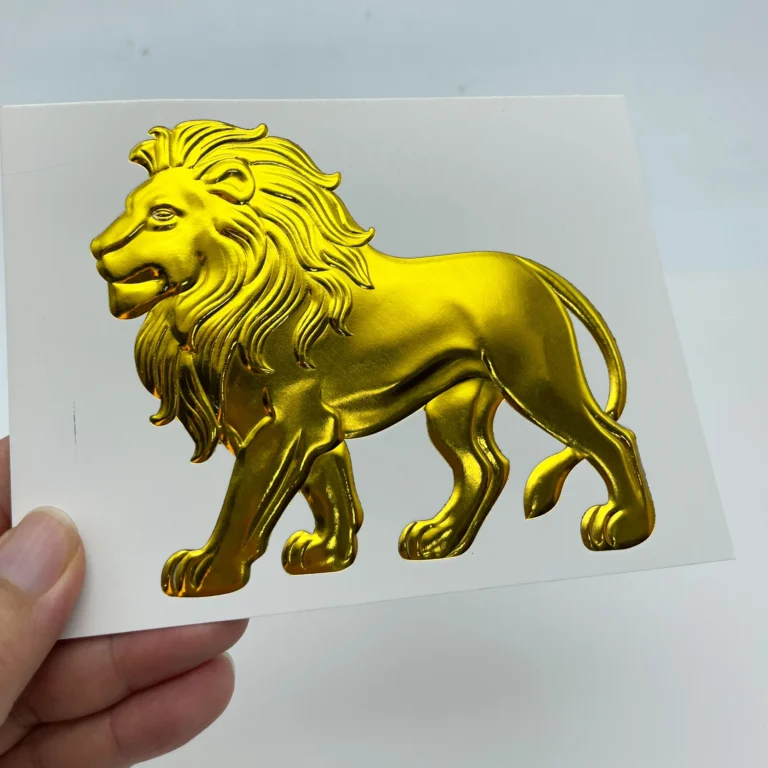
Complex traditional artwork reproduced cleanly, high‑precision CNC engraving captures ornate fine decorative details.
200°C: Fuller Transfer but More Heat Risk
At 200°C, the foil transfer became more complete, and large areas could look fuller. That improvement does not automatically make 200°C the better production setting.
The report notes a higher risk of edge spread, light pressure marks, and reduced surface gloss. Transparent acrylic products are especially sensitive because changes to the surface can be seen under reflections and lighting. Higher heat can also increase the possibility of local softening or slight deformation.
For that reason, avoid increasing to 200°C simply because a logo looks more filled. First check whether the same improvement can be achieved through more even pressure, cleaner contact, a better-matched foil, or a small adjustment around the 190°C reference point.
How to Adjust Acrylic Foil Stamping in Real Production
The documented 190°C / 1-second setting is a starting reference, not a promise that every acrylic project will use the same number. Use a controlled sample plan so that only one variable changes at a time.
Step 1: Confirm the Acrylic Surface
Identify whether the sheet is cast or extruded, clear or colored, glossy or matte, coated or uncoated, and thin or thick. Different acrylic grades and surface finishes can respond differently to heat.
Remove dust, oil, protective-film residue, and foil fragments before testing. A clean surface is especially important for a high-gloss acrylic panel because small contaminants can interrupt contact.
Step 2: Keep the Mold and Support Stable
Make sure the silicone mold sits flat and reaches the whole design area. The acrylic should be supported underneath so it does not flex away from the mold during pressure.
For curved or irregular products, check the contact pattern rather than assuming the mold is conforming correctly. Uneven contact can look like a temperature problem even when the heat setting is correct.
Step 3: Start at the Documented Reference
開始時 190°C and 1 second for a similar acrylic, foil, and silicone mold combination. Produce at least one sample with fine details and one sample with a larger filled area.
Record the machine, foil model, temperature, time, pressure setting, acrylic type, acrylic thickness, and mold condition. This record becomes more useful than a single temperature number when the same design is repeated later.
Step 4: Change One Variable at a Time
If the foil is incomplete, first inspect pressure, contact, surface cleanliness, and foil compatibility. Then make a small temperature adjustment. Do not change temperature, pressure, time, foil, and artwork in one trial, because the result will not tell you which change helped.
If edges spread or the acrylic loses gloss, reduce heat or dwell time and repeat the same sample. Also inspect whether the pressure is too heavy. A short cycle with balanced pressure is usually safer than simply adding more heat.
Step 5: Test the Real Product Shape
A flat acrylic sheet is not always representative of a finished sign, award, electronic panel, or decorative part. Test the actual product geometry, support method, and stamping location before approving a batch.
If you are selecting equipment for a wider range of materials, compare our guide on how to choose the right hot stamping machine and the guide on レザー製品のためのベストなホットスタンピング機械の選び方. The same decision logic—working area, pressure, temperature control, tooling, and production volume—also helps with acrylic projects.
Common Acrylic Foil Stamping Defects and Fixes
Defect
Likely cause
First checks
箔の欠落
Temperature too low, pressure too weak, incompatible foil, incomplete contact
Check surface, pressure, foil model, and mold contact before raising heat
Broken thin lines
Fine artwork, uneven pressure, dirty mold, insufficient transfer
Clean the mold, confirm contact, and test a small temperature increase
Weak metallic gloss
Foil release is incomplete or pressure is inconsistent
Check foil compatibility and whether the silicone mold is contacting evenly
Blurry or spreading edges
Temperature or pressure is too high
Reduce heat or pressure and inspect the artwork edge
Surface gloss reduction
Acrylic is receiving too much heat
Shorten dwell time or lower temperature
Light pressure marks
Pressure is concentrated in one area or support is uneven
Improve the backing support and reduce local pressure
Slight deformation
Heat exposure is too high or too long
Return to a shorter cycle and test below 200°C
Foil peels after stamping
Foil and acrylic surface are mismatched or adhesion is weak
Check foil type, surface preparation, and cooling before handling
The machine setting cannot rescue artwork that is too fine for the material, foil, and die combination. Before ordering a custom mold, check:
Minimum line width for the chosen artwork
Smallest text size and character spacing
Large solid areas that may hold excess heat
Fine internal openings that may collect foil residue
Sharp corners that need clean pressure contact
Clearance from the acrylic edge, hole, seam, or curved transition
For custom logo projects, send clean vector artwork and confirm the finished stamping size. The file-preparation guidance in custom brass stamp artwork file requirements can be used as a starting checklist even when the final tooling is silicone rather than brass.
If the design requires raised levels or an embossed decorative effect instead of a flat foil mark, compare 3D relief brass hot stamping dies. Tooling choice should follow the desired surface effect, not just the material name.
Choosing a Machine for Acrylic and Other Materials
The TJ8020PS process documented here is a material-and-tooling test. If you are still comparing machines for sampling or production, start with the ZHENGFEI hot stamping machine category.
For different production needs, these product pages may be useful comparison points:
The correct choice depends on acrylic size, required pressure, production volume, mold dimensions, operator workflow, and whether the same machine will also process leather, paper, wood, or coated plastics. For a practical explanation of temperature, pressure, and time as a system, read our hot stamping temperature, pressure, and time guide.
Production Checklist
Before approving acrylic foil stamping for batch production, confirm all of the following:
The acrylic grade, thickness, color, and surface finish are recorded.
The foil model is suitable for the acrylic surface.
The silicone mold is clean, undamaged, and evenly supported.
The acrylic part is held flat and cannot move during stamping.
The sample starts at 190°C / 1 second when the combination is similar to this test.
Fine lines, small details, and large solid areas are all tested.
The stamped area is checked for incomplete transfer, edge spread, marks, gloss change, and deformation.
The final temperature, pressure, dwell time, foil, mold, and support method are written into the production record.
Keep the production conditions stable after approval. Temperature drift, mold wear, foil changes, and different acrylic batches can all create visible differences between production lots.
For a project-specific material test, machine recommendation, or custom tooling review, contact ZHENGFEI.
Frequently Asked Questions
What is the best acrylic foil stamping temperature?
In the documented TJ8020PS test, 190°C was the best reference temperature for PMMA acrylic sheet with a silicone mold. The recommended condition was 190°C for 1 second. Test the actual acrylic grade, foil, mold, and product structure before batch production.
Can you hot foil stamp acrylic sheet?
Yes. Acrylic sheet can receive foil-stamped logos, text, and decorative graphics when the foil, temperature, pressure, dwell time, and mold contact are matched correctly. Silicone molds can help distribute pressure and conform to the acrylic surface.
Why does foil not transfer completely on acrylic?
Common causes include insufficient temperature, weak or uneven pressure, unsuitable foil, dirty acrylic, poor mold contact, or artwork details that are too fine. Check these factors in a controlled order instead of increasing temperature immediately.
Is a silicone mold suitable for acrylic foil stamping?
It can be suitable when the acrylic surface needs flexible, even contact or the product has slight irregularities. The mold must still be clean, correctly supported, and matched to the artwork and pressure requirements.
Can 200°C be used for acrylic foil stamping?
The test showed fuller transfer at 200°C, but it also showed higher risk to the acrylic surface, including edge spread, pressure marks, gloss reduction, softening, or slight deformation. It should not be the default long-run setting without a successful product-specific test.
Does acrylic thickness change the temperature?
It can. Thickness, acrylic grade, surface coating, product geometry, foil model, pressure, and dwell time all affect heat response. A thicker or better-supported part may behave differently from a thin or unsupported sheet, so test the actual production part.
結論
For the tested combination of TJ8020PS hot stamping machine + silicone mold + PMMA acrylic sheet, the best acrylic foil stamping temperature was 190°C for 1 second.
At 170°C, foil release was incomplete. At 180°C, transfer improved but some areas remained less stable. At 190°C, the foil transferred evenly with sharp edges, clear details, and natural metallic gloss. At 200°C, the transfer became fuller, but the acrylic faced greater risk of edge spread, pressure marks, gloss reduction, softening, and slight deformation.
Use 190°C / 1 second as a practical starting reference, then confirm the result with the actual acrylic, foil, silicone mold, artwork, pressure, and support method. If you need help selecting a machine, designing a mold, or arranging a sample test, contact ZHENGFEI.
Author and Test Note
This article is based on a ZHENGFEI process test prepared by John Zhao, founder of ZHENGFEI. The company has more than 21 years of experience covering graphic design, book and packaging printing, hot stamping processes, equipment selection, custom mold production, and production support. The test value is a practical reference; it should not replace a sample test on the buyer’s actual material and production structure.
あなたの愛を分かち合いましょう
ZHENGFEI Technical Team
ZHENGFEI Technical Team shares practical hot stamping knowledge from real production tests, including brass die design, foil stamping parameters, machine setup, leather, paper, acrylic, plastic, wood and packaging applications.







 English
 Japanese
 Spanish
 French
 Korean
 German
 Russian