Wir verwenden Cookies, um sicherzustellen, dass wir Ihnen die beste Erfahrung auf unserer Website bieten.
Contact Founder
Still have doubts?
Connect directly with our Founder. Whether it’s about pricing or technical details, get a straight answer and an exclusive “Founder’s Bonus” for your first order.
900+ Satisfied Clients
🏆 Over 1000+ Custom Projects Successfully Delivered.
If the heat is too low, the foil may not transfer completely. If the heat is too high, the paper can show deep press marks, edge spreading, deformation, or yellowing.
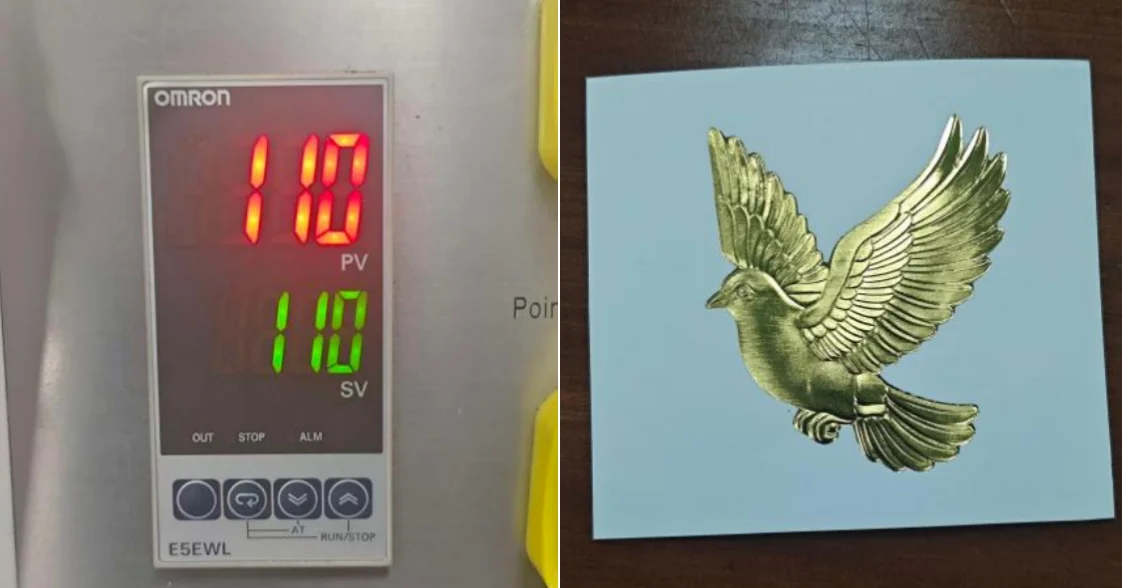
Based on recent Zhengfei tests with napkin paper and 3D embossed paper foil stamping, a practical reference setting is often around 110°C with 2 seconds dwell time. This setting produced strong foil transfer, clear edges, and good surface protection in both test cases.
This guide explains how to choose the best foil stamping temperature for paper, napkins, cardstock, packaging, invitations, book covers, and 3D embossed designs.
Quick Answer
For many paper foil stamping applications, start with:
Temperatur: 100-110°C
Dwell time: 1.5-2.5 seconds
Druck: medium and even
Die type: brass die for flat foil stamping, 3D embossing die for raised effects
In our recent tests:
Napkin paper with a copper/brass die performed best at 110°C for 2 seconds
3D embossed paper foil stamping also performed best at 110°C for 2 seconds
The exact setting still depends on paper thickness, paper moisture, foil type, artwork size, die structure, and machine pressure.
Why Paper Foil Stamping Needs Careful Temperature Control
Paper reacts quickly to heat and pressure. Thin paper, soft paper, napkins, and textured paper can deform more easily than coated cardstock or book cover board.
When the temperature is too low, common results include:
missing foil
broken lines
weak metallic shine
poor adhesion
incomplete transfer in small details
When the temperature is too high, common results include:
deep press marks
unscharfe Kanten
Folienverbreitung
paper fiber damage
surface yellowing or deformation
This is why the best result is usually found in the balanced middle range, not at the highest temperature.
Test 1: Napkin Paper Foil Stamping with 618M
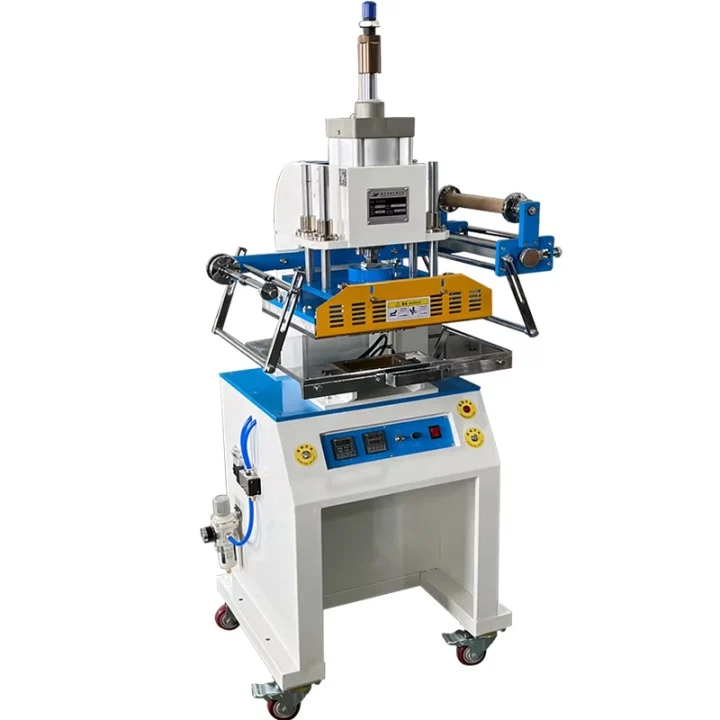
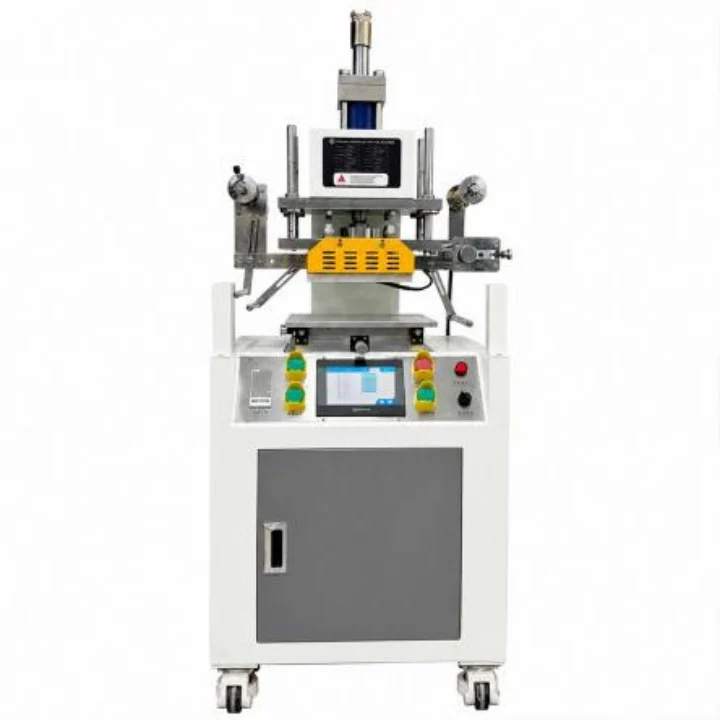
https://zhengfeitechnology.com/machines/Boost your production efficiency with our industrial-grade 618M pneumatic hot stamping machine, factory-direct at unbeatable prices.
Napkin paper is thin and soft, so it needs enough heat for foil transfer but not so much heat that the fiber structure is damaged.
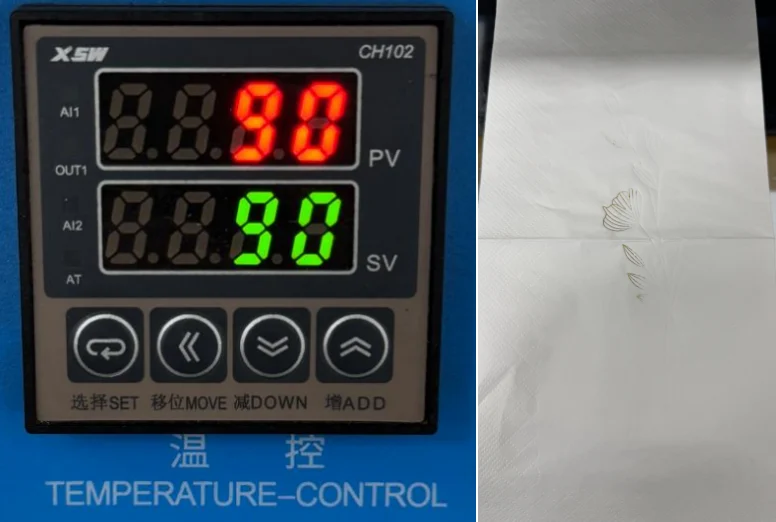
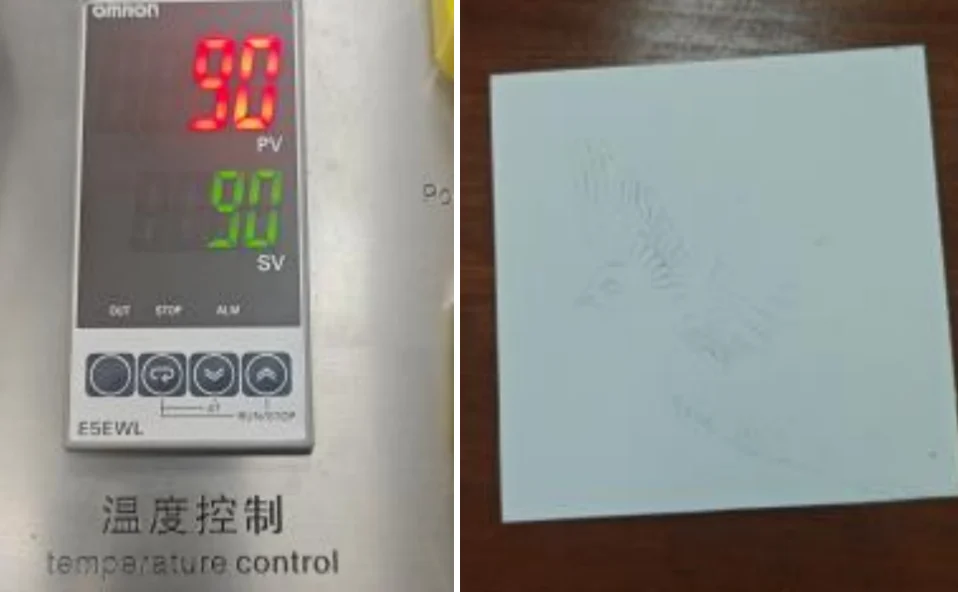
90 °C
At 90°C, the foil transfer was not complete. The metallic layer looked weak, some details were missing, and the adhesion was not strong enough for a stable production result.
See the risk of underheating: 90℃ fails to fully activate the foil, leading to faint, partial transfers on napkins.
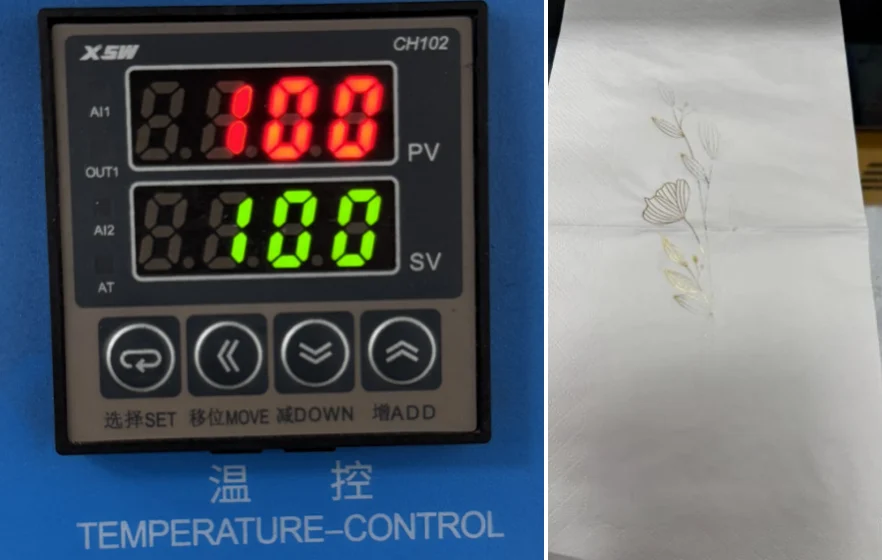
100°C
At 100°C, the foil began to transfer more steadily. Most areas could stamp successfully, but some fine details still showed slight missing foil.
At 100℃, the foil begins to activate, but still lacks the full coverage needed for crisp, professional results.
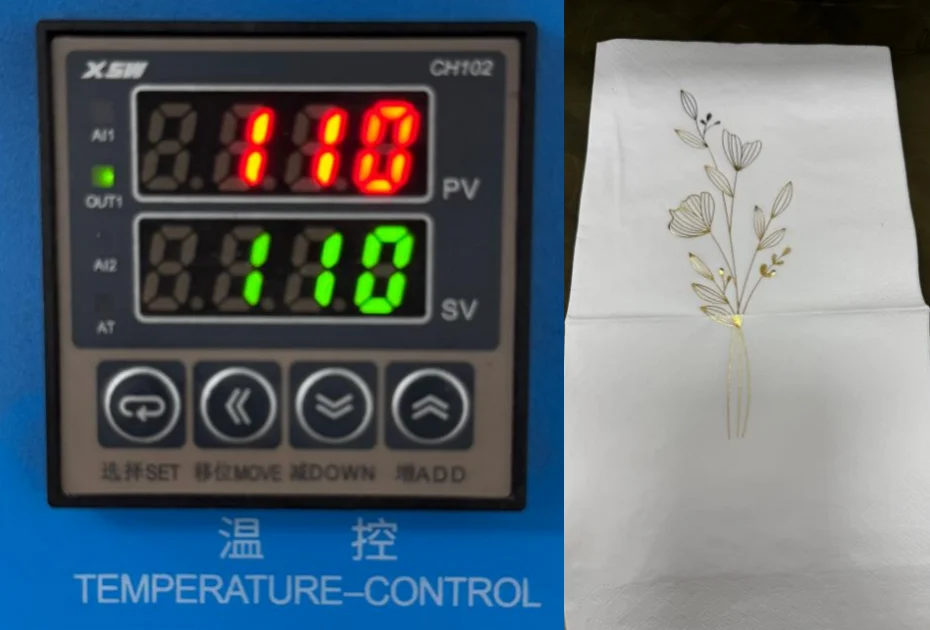
110°C
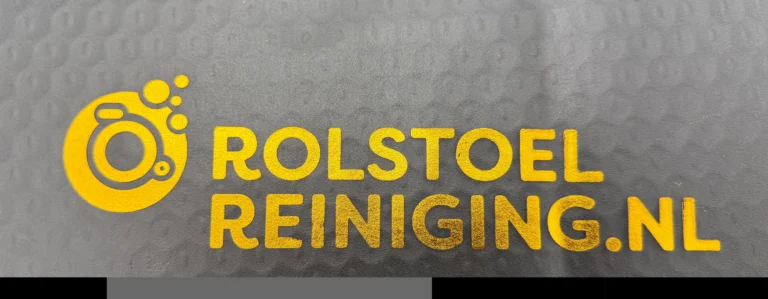
At 110°C, the result was the most balanced. The foil transferred fully, the design edges were sharp, and the metallic shine was even. The napkin paper surface stayed clean without obvious damage.
Our factory-calibrated sweet spot: 110℃ delivers full, vibrant gold foil transfers with sharp detail on napkins.
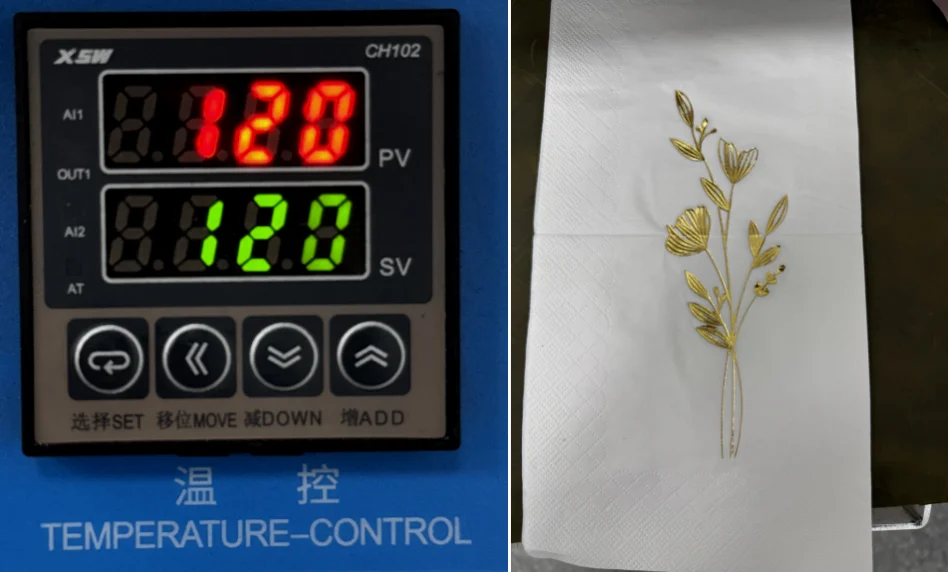
120°C
At 120°C, the foil looked bright and full, but the press mark became deeper. Some edges started to spread slightly, and the paper fiber was affected by the extra heat.
Too much heat can ruin your design: 120℃ causes slight edge bleeding, risking damage to delicate napkin paper.
For napkin paper, 110°C with 2 seconds dwell time is a strong reference setting.
Note: Even though that article focuses on leather, the logic of temperature, pressure, dwell time, foil compatibility, and die contact also applies to paper stamping.
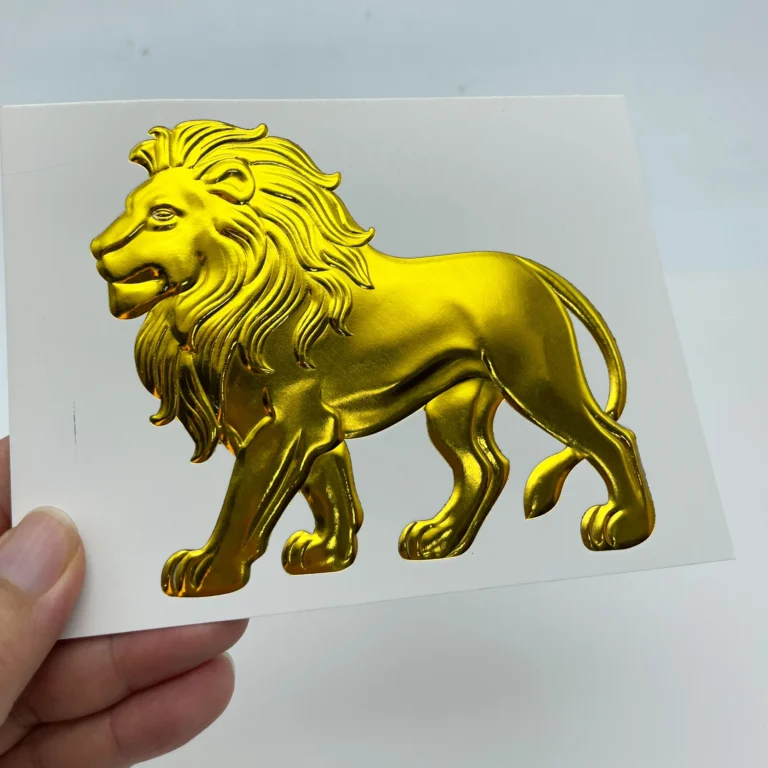
3D embossed foil stamping is more demanding than flat foil stamping because it combines foil transfer with a raised or recessed relief effect. The upper and lower dies must match accurately, and temperature must support both metallic transfer and clear dimensional texture.
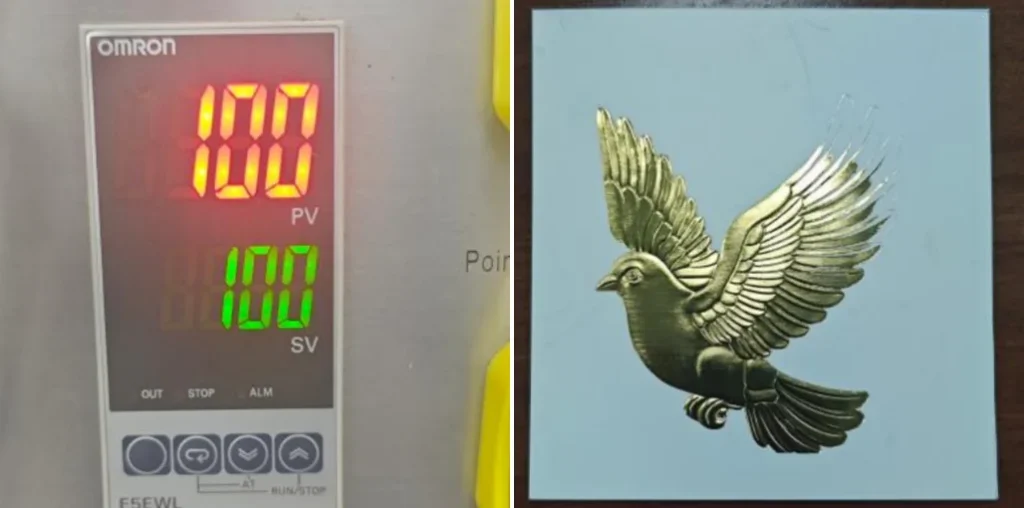
90 °C
At 90°C, the foil did not transfer fully. Small text and fine lines were more likely to show missing foil or broken areas. The embossed shape existed, but the metallic brightness was weak.
See why precise temperature control matters: 90℃ fails to activate the foil, resulting in no visible stamping.
100°C
At 100°C, the foil transfer became more stable. Most of the design appeared clearly, but some deeper texture areas still showed slight missing foil.
At 100℃, the foil begins to transfer, but still lacks the full coverage needed for professional results.
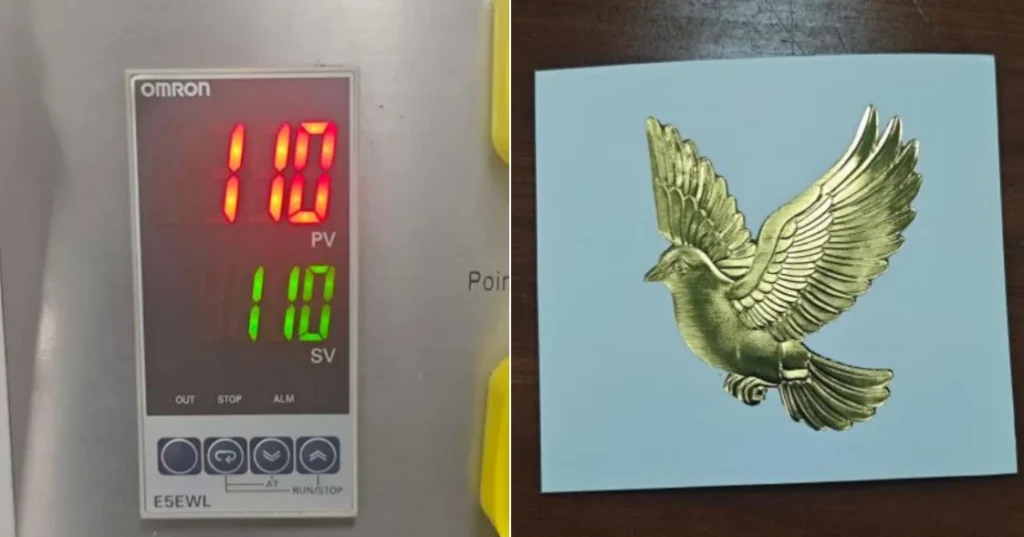
110°C
At 110°C, the result was the best overall. The foil transferred evenly, the edges stayed sharp, and the 3D relief effect looked rich and dimensional. The paper surface stayed flat without obvious heat damage.
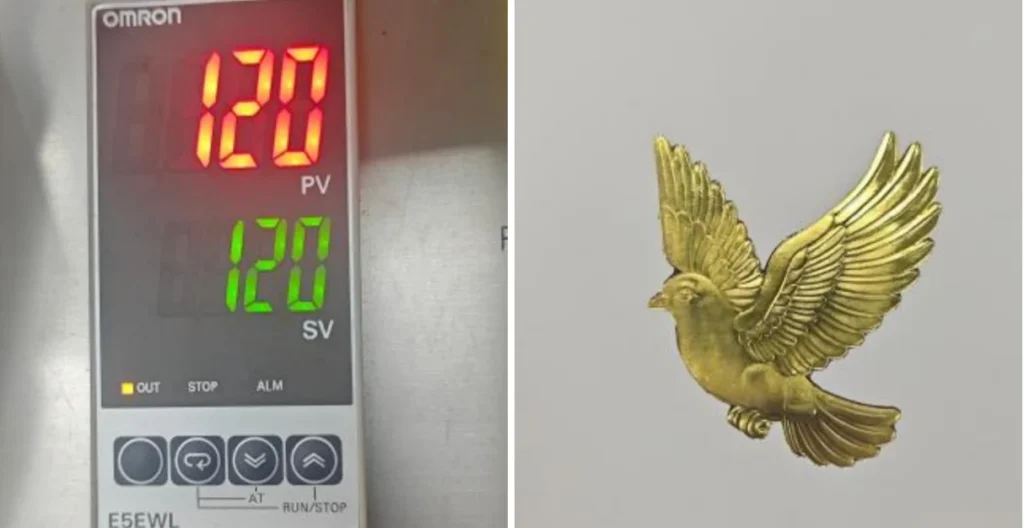
At 120°C, the foil appeared more saturated, but some fine details started to spread. Local press marks became more noticeable, and the overall stability was slightly lower than at 110°C.
The optimal temperature: 120℃ delivers stunning, vibrant gold foil transfers with sharp, detailed edges.
For 3D embossed paper foil stamping, 110°C with 2 seconds dwell time is a practical starting point for packaging, greeting cards, invitations, book covers, and premium printed products.
Temperature Comparison Table
Temperatur
Napkin Paper Result
3D Embossed Paper Result
Production Suggestion
90 °C
Weak transfer, missing foil, poor adhesion
Weak shine, broken fine lines
Too low for most standard jobs
100°C
Mostly stable, slight missing detail
Better transfer, some deep areas may miss foil
Good starting test temperature
110°C
Best balance of transfer, clarity, and paper protection
Best balance of foil, relief, and edge sharpness
Recommended reference setting
120°C
Bright foil but deeper press marks and slight spreading
Full foil but edge spreading risk
Use carefully after testing
How Pressure Affects Paper Foil Stamping
Temperature is important, but pressure can change the result just as much.
If pressure is too low:
foil may not transfer completely
deep texture areas may miss foil
small details may look broken
If pressure is too high:
paper may show deep press marks
thin paper may deform
fine lines may spread
3D embossing may look over-compressed
For napkins and thin paper, use controlled pressure. For large designs, pressure may need to increase slightly. For small detailed artwork, it is usually better to control temperature and dwell time first.
How Dwell Time Affects the Result
Dwell time is the contact time between the heated die, foil, and paper.
For thin paper and napkins, a useful test range is:
1,5 Sekunden for delicate materials or fine details
2 seconds for balanced transfer and clarity
2.5 seconds for larger areas if transfer is incomplete
Longer time is not always better. If the die stays too long, heat continues spreading through the paper and can create deeper marks, yellowing, or blurred edges.
Flat Brass Die vs 3D Embossing Die
Flat brass dies and 3D embossing dies create different results.
Benutzerdefinierte Messingstempel für Lederlogos: Welches Dateiformat benötigen Sie?
If you are preparing a logo die for paper, packaging, or foil stamping projects, artwork quality matters. You can also review what file format you need for a custom brass stamp before production.
increase temperature gradually from 100°C to 110°C
check die leveling
increase dwell time slightly
test a foil type suitable for paper
Edges Look Blurry or Spread
Mögliche Ursachen:
Die Temperatur ist zu hoch
pressure is too strong
Die Verweilzeit ist zu lang
artwork detail is too fine
Beheben:
Temperatur reduzieren
Verweildauer verkürzen
Druck leicht reduzieren
simplify extremely fine artwork
Suggested sentence: For fine logos, initials, or small lettering, this is similar to the edge-control problem in leather stamping. You can also read how to stamp small letters without blurry edges for more detail-control ideas.
test a slightly thicker paper if the design allows
3D Embossing Looks Misaligned
Mögliche Ursachen:
upper and lower dies are not aligned
paper moved during stamping
pressure is uneven
fixture setup is unstable
Beheben:
check die alignment before production
use a stable positioning fixture
test multiple samples before batch production
keep the die surface clean
Best Practice Before Bulk Production
Before mass production, always run samples using the exact paper batch, foil type, die, and machine setup.
A practical workflow is:
Start at 100°C
Stamp for 2 seconds
Check foil transfer, edge sharpness, and paper marks
Increase to 110°C if transfer is incomplete
Avoid 120°C unless the material test proves it is safe
Confirm the sample before batch production
Paper moisture, room temperature, foil model, and paper thickness can all change the final result. A short test prevents a lot of waste.
Empfohlene Anwendungen
Paper and napkin foil stamping is useful for:
restaurant napkins
hotel napkins
wedding napkins
Luxuriöse Verpackungen
paper bags
Grußkarten
invitation cards
certificates
Buchumschläge
branded stationery
For premium packaging and printed products, 3D embossed foil stamping can create a stronger visual and tactile effect than flat foil alone.
Abschließende Gedanken
For many paper and napkin foil stamping projects, 110°C with 2 seconds dwell time is a strong reference setting. In Zhengfei’s recent tests, this temperature gave the best balance between foil transfer, edge clarity, metallic shine, and paper surface protection.
Start around 100°C when testing delicate paper, then move toward 110°C if the foil transfer is incomplete. Use 120°C carefully because it can improve fullness but may also increase edge spreading and press marks.
Need help testing paper foil stamping for your project? ZHENGFEI provides manual hot stamping machines, copper/brass dies, 3D embossing dies, and factory-direct process support for paper, napkin, packaging, book cover, and custom branding applications. Send your artwork, paper type, foil color, and stamping size, and we can help recommend a suitable machine and die setup.
Häufig gestellte Fragen
What is the best temperature for foil stamping on napkins?
In our napkin paper test with a 618M machine and copper/brass die, 110°C with 2 seconds dwell time gave the best balance of foil transfer, sharp edges, and paper protection.
What is the best temperature for 3D embossed paper foil stamping?
In our YTJ5T test with a 3D embossing die, 110°C with 2 seconds dwell time produced the most balanced result, with clear foil transfer and strong relief detail.
Why does foil not transfer fully on paper?
The most common reasons are low temperature, weak pressure, short dwell time, unsuitable foil, or uneven die contact.
Why does paper show deep press marks after foil stamping?
Deep press marks usually come from too much pressure, too high a temperature, too long a dwell time, or paper that is too thin for the design.
Is 120°C too hot for paper foil stamping?
Not always, but it should be tested carefully. In our tests, 120°C made the foil look fuller but also increased the risk of deeper marks and slight edge spreading.
Can the same machine stamp leather and paper?
Many manual hot stamping machines can work with both leather and paper, but the settings must be adjusted. Paper often needs careful pressure control, while leather settings depend heavily on the material surface.
Teilen Sie Ihre Liebe
ZHENGFEI Technical Team
ZHENGFEI Technical Team shares practical hot stamping knowledge from real production tests, including brass die design, foil stamping parameters, machine setup, leather, paper, acrylic, plastic, wood and packaging applications.






 English
 Japanese
 Spanish
 French
 Korean
 German
 Russian